How to log in to a headless Mac mini after a restart
DispMini starts after you log in to macOS. After a restart, use Screen Sharing from your iMac to log in once, then close it and let DispMini take over. If FileVault is on, unlock its disk from the iMac first.
In this guide, Mac mini means the Mac running DispMiniSender, and iMac means the Mac you use as its display, running DispMini. If you use a MacBook or Mac Studio as the Sender, the same steps apply.
Why this is needed
DispMiniSender runs inside your user session, so after a restart it can't start until someone logs in. Until then, your iMac stays on the Waiting for picture… screen. A Mac mini with no monitor has no screen to log in on, so you log in from the iMac instead.
What the Mac mini waits for depends on FileVault. You can check it on the Mac mini in System Settings → Privacy & Security → FileVault.
- FileVault off: the Mac mini waits at the login window. Follow steps 1 to 4 below. If the Mac mini is somewhere only you can reach, you can instead turn on automatic login in System Settings → Users & Groups on the Mac mini, so it goes straight to the desktop after a restart. Anyone who can use the Mac mini then gets into your account without a password.
- FileVault on: the Mac mini first waits for its disk to be unlocked, and Screen Sharing can't connect until then. Unlock the disk from the iMac first, then follow steps 1 to 4.
Before you start
Set these up while you can still reach the Mac mini. You can't turn them on from the iMac after it restarts.
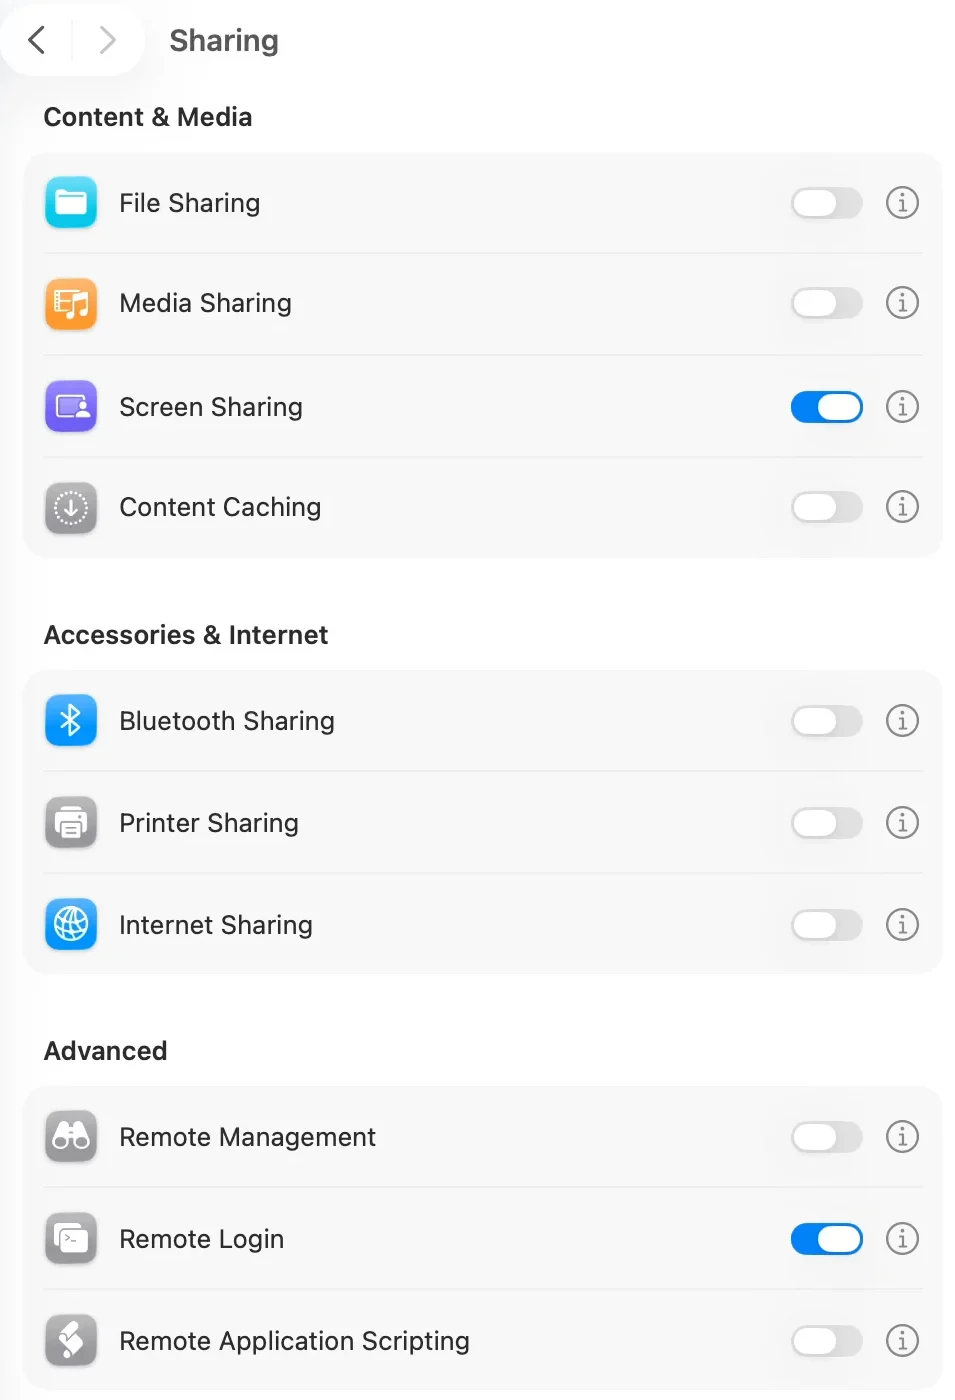
- Screen Sharing: on the Mac mini, turn it on in System Settings → General → Sharing.
- Launch at login: on the Mac mini, turn it on in DispMiniSender's Settings, so DispMini starts as soon as you log in.
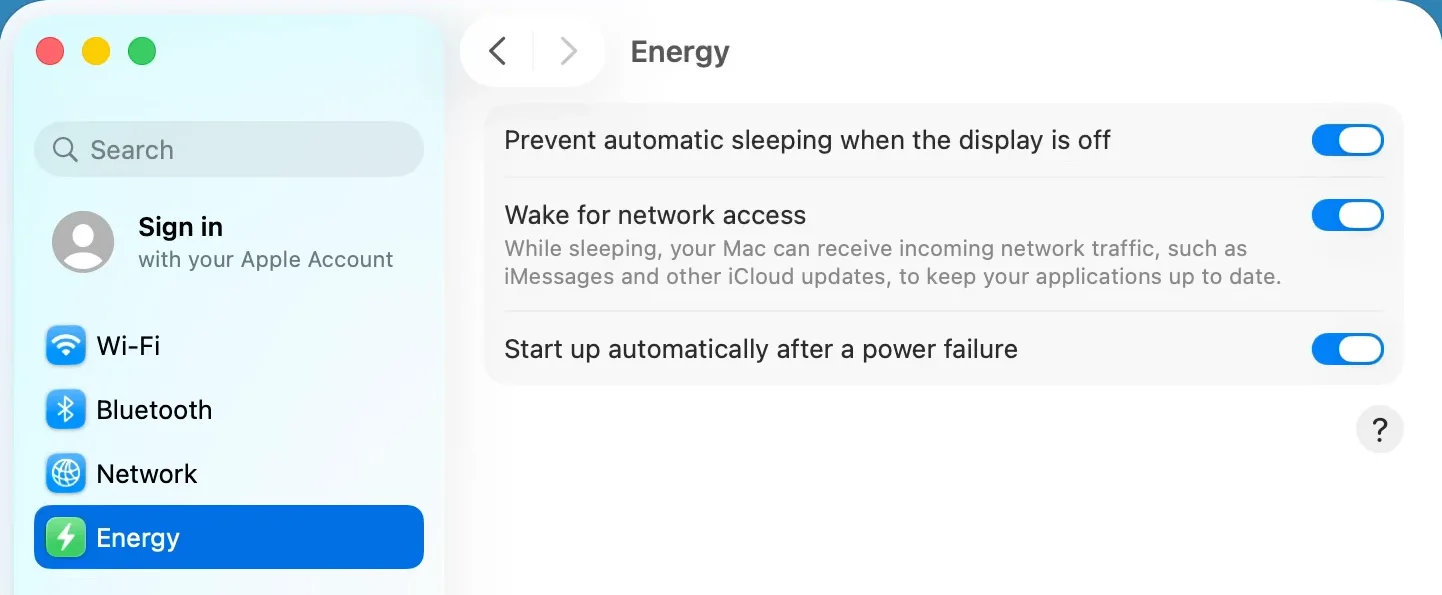
- Start up after a power failure: on the Mac mini, turn on Start up automatically after a power failure in System Settings → Energy, so it starts by itself when the power comes back.
- Cable: by default, Log In with Screen Sharing only finds Macs connected by cable (Ethernet or Thunderbolt). If the two Macs are only on Wi-Fi, turn off Limit Wi-Fi discovery DispMini's Settings on the iMac, and put both on the same network.
- If FileVault is on: also set up what you need to unlock the disk.
1. Open Screen Sharing from DispMini
Open DispMini on the iMac. After a few seconds, Log In with Screen Sharing appears on the Waiting for picture… screen.
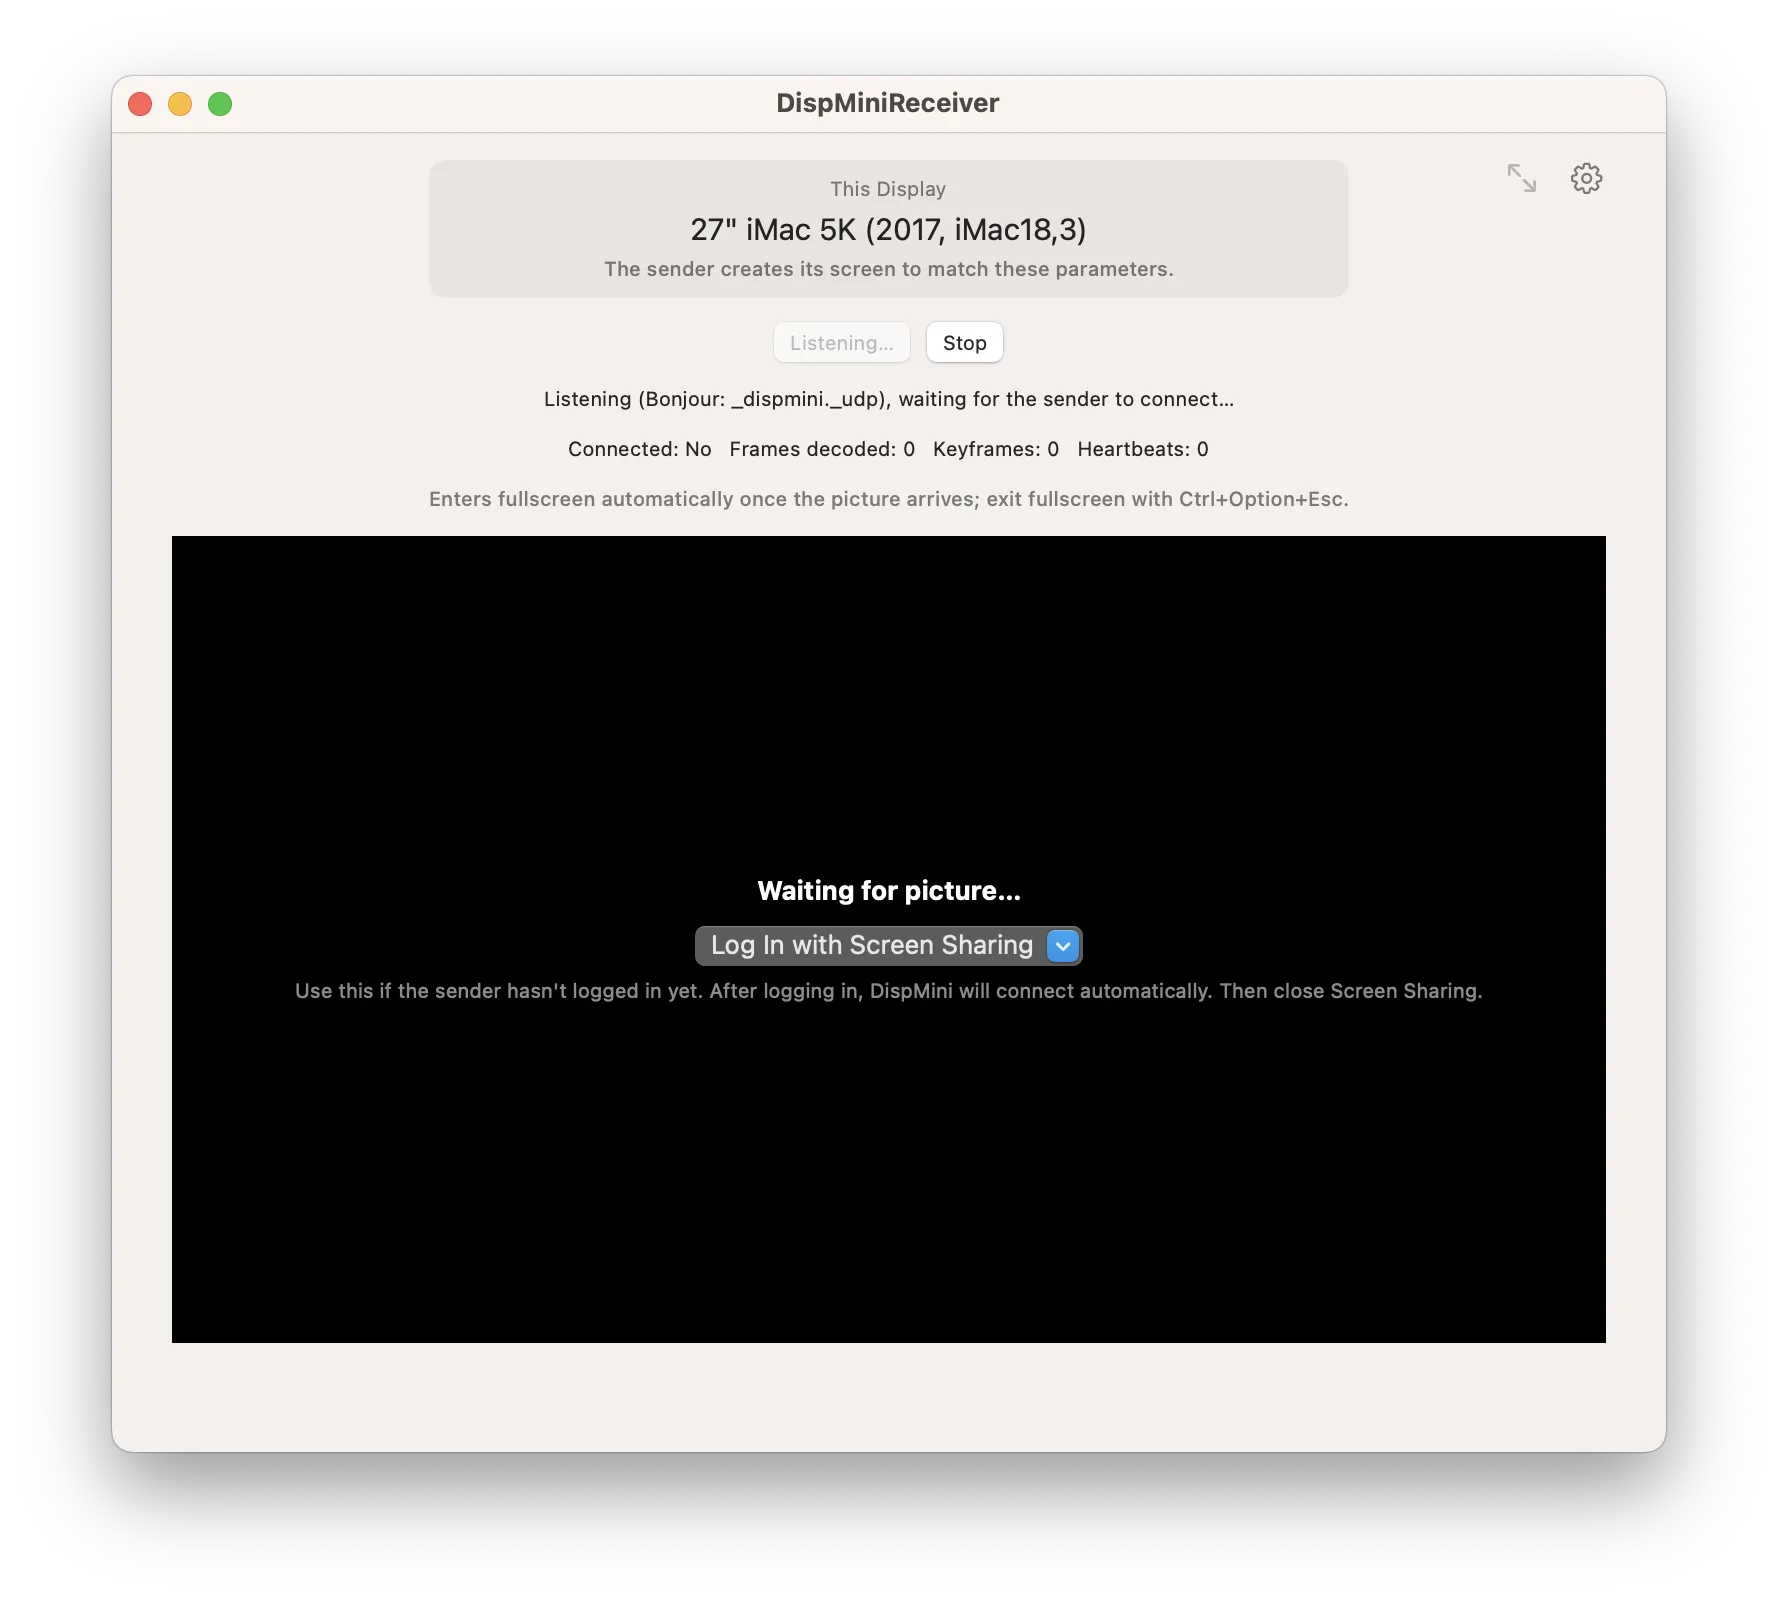
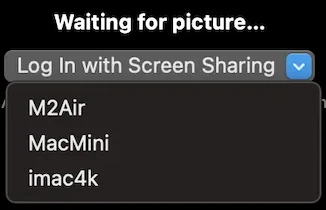
Click it and choose your Mac mini. If DispMini finds only one Mac, you'll see a single button with your Mac's name instead of a menu.
If DispMini is in fullscreen, it exits fullscreen first so you can see the Screen Sharing window.
2. Sign in to Screen Sharing
Enter the user name and password of your account on the Mac mini. If you see the Connect options, choose As Registered User.
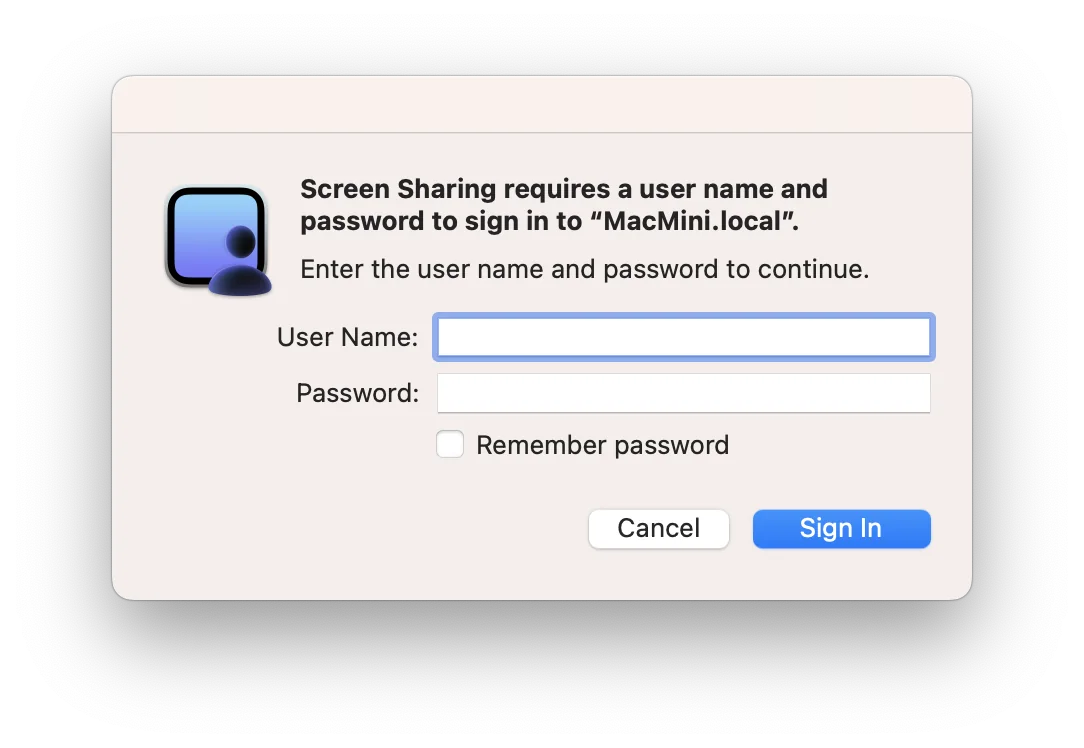
Select Remember password to skip this window next time. The password is saved in the iMac's keychain, so only do this on an iMac you trust. DispMini never sees your password; macOS handles it.
3. Log in at the login window
The Screen Sharing window shows the Mac mini's login window. Choose your account and enter your password, just as if you were sitting in front of it.
4. Close Screen Sharing
Once you log in, DispMiniSender starts by itself if Launch at login is on. You can check that its icon is in the Mac mini's menu bar. Over a cable with the default settings, it's already sending the picture, so your iMac switches to fullscreen and shows the Mac mini's desktop.
Screen Sharing is still open behind it. Switch to the iMac's own desktop and close the Screen Sharing window.
Don't keep working in Screen Sharing. It's only there to get you logged in.
If FileVault is on: unlock the disk first
With FileVault on, the Mac mini stops before the login window and waits for its disk to be unlocked. Screen Sharing isn't running yet, so you first unlock the disk from the iMac over a cable, in Terminal. Your password is handled by Terminal and macOS; DispMini never sees it.
What you need
- The latest DispMini on the iMac. Download it here.
- A Mac mini with Apple silicon running macOS 26 or later.
- Remote Login and Screen Sharing both turned on in System Settings → General → Sharing on the Mac mini, before it restarts. Remote Login is for unlocking the disk, and Screen Sharing is for logging in afterward.
- An account that can unlock the disk at startup and that Remote Login allows. The administrator account you set up the Mac mini with works.
- A wired connection: a Thunderbolt cable between the two Macs, or Ethernet. The unlock button only appears for Macs connected by cable, never over Wi-Fi. You don't need to set fixed IP addresses.
After each restart
- On the iMac's Waiting for picture… screen, click Unlock … in Terminal… with your Mac mini's name (Unlock M2Air in Terminal… in the picture below). It appears with a note that the Mac is waiting for its FileVault disk to be unlocked.

- A window opens with the Mac mini's name already filled in as the address, such as
MacMini.local. If Terminal can't connect, click Can't connect? Use … instead at the bottom of the window to use its IP address. Enter the account name you use on the Mac mini and click Open in Terminal. DispMini remembers the account name for each Mac, and you can change it here.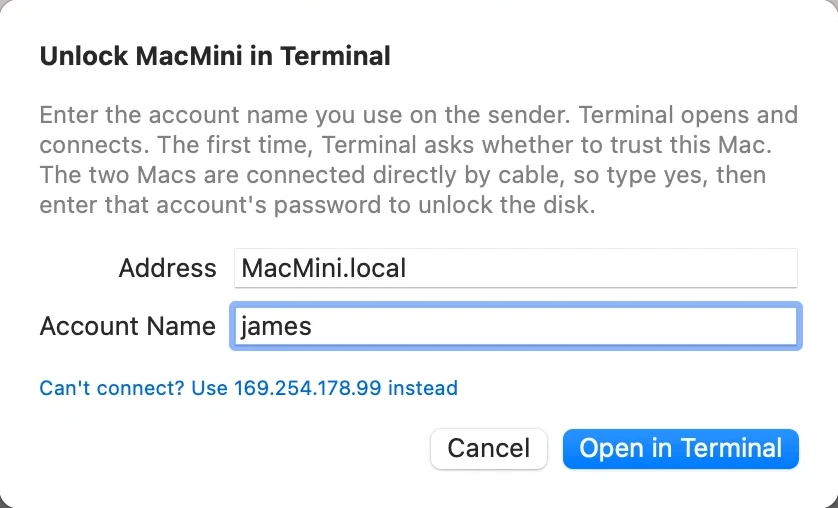
- Terminal opens and connects. The first time, it asks whether to trust the Mac mini. The two Macs are connected directly by cable, so type
yes.
- Enter that account's password. When Terminal says System successfully unlocked, the connection closes by itself, and you can close Terminal.
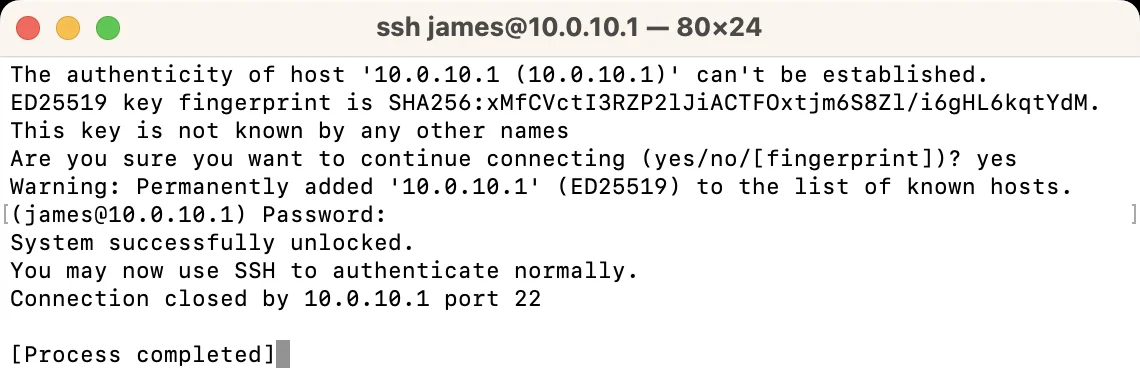
- The unlock button disappears while the Mac mini finishes starting up. After a few seconds, Log In with Screen Sharing appears. Continue from step 1.

Terminal asks whether to trust the Mac mini the first time it connects to each address. Because the address is the Mac mini's name, that only happens once. If you switch to the IP address, it may ask again. If it ever warns that the Mac's identity has changed, stop and don't enter your password.
After a power failure
If Start up automatically after a power failure in System Settings → Energy is on, the Mac mini starts by itself when the power comes back and waits for its disk to be unlocked. Unlock it and log in from the iMac in the same way. We've tested this with a Mac mini over Ethernet.
Why use DispMini instead of Screen Sharing
Screen Sharing is good for reaching a Mac from somewhere else for a few minutes. DispMini is built to make your iMac work as the Mac mini's display all day. We haven't benchmarked the two against each other; they're simply made for different jobs.
| DispMini | Screen Sharing | |
|---|---|---|
| Built for | All-day viewing, with hardware H.265 video over a Thunderbolt or USB4 cable | Reaching a Mac remotely for a short time |
| Resolution | Creates a real display at the iMac's own resolution, with the picture lined up pixel for pixel | Shows the Mac mini's screen in a window, so the picture may be scaled to fit |
| Ease of use | Connects and goes fullscreen by itself, and looks like a normal monitor | You open it and connect each time, and it stays a window on the iMac's desktop |
On a 27-inch 5K iMac, DispMini shows the picture at the panel's full 5120×2880, using hardware decoding.
If something goes wrong
The login button doesn't appear
- Check that the Mac mini has finished restarting and that Screen Sharing is turned on.
- Check that the Macs are connected by cable. If they're only on Wi-Fi, turn off Limit Wi-Fi discovery DispMini's Settings on the iMac.
- On macOS 15 or later, allow DispMini on the iMac in System Settings → Privacy & Security → Local Network.
- If FileVault is on, the Mac mini doesn't appear until its disk is unlocked. Unlock the disk first.
- The button only appears while nothing is connected. It doesn't appear while the Mac mini is asleep or if you disconnected it yourself. If it's asleep, click its row on the waiting screen, which says Asleep · Click to wake.
The unlock button doesn't appear
- The unlock button never uses Wi-Fi. Check that the Macs are connected by cable (Thunderbolt or Ethernet), and that Remote Login was turned on before the restart on a Mac mini with Apple silicon and macOS 26 or later.
- If the Mac mini was forced to shut down, such as by holding down the power button, it can't be unlocked over the Thunderbolt cable. Connect a display and keyboard to unlock it.
- After a power failure, the Mac mini only starts by itself if Start up automatically after a power failure in System Settings → Energy is on. Otherwise, press its power button.
- Right after unlocking, the button disappears for a few seconds before Log In with Screen Sharing appears. That's normal.
DispMini doesn't connect after you log in
- Check that Launch at login is turned on in DispMiniSender's Settings. If it isn't, open DispMiniSender from Screen Sharing and turn it on.
- By default, DispMini connects automatically only when a Thunderbolt cable is plugged in. On Wi-Fi, set Auto-connect under Known Displays in DispMiniSender's Settings to Thunderbolt or Wi-Fi, then check Over Wi-Fi for your iMac.
For other problems, see Troubleshooting.